In summary:
- Effective jewelry layering is a system based on managing visual weight and negative space, not just for necklaces but across all accessories.
- Achieve perfect necklace spacing by varying lengths by at least two inches and balancing the thickness of each chain.
- For a cohesive look, apply the « one focal zone » rule: let one area (neck, ears, or hands) have a statement piece, keeping others minimal.
- Prevent skin irritation by understanding that friction from layering cheap, plated jewelry accelerates nickel exposure.
- Adapt your jewelry to the context, removing the visually heaviest pieces for professional settings and matching weight to fabric integrity.
That familiar knot of gold and silver chains on your dresser is a common sight for any jewelry lover. You spend precious minutes untangling a delicate web, all for the sake of achieving that coveted layered necklace look. The common advice is a chorus of familiar refrains: vary your lengths, mix textures, and maybe buy a special clasp. While these tips have merit, they only address the surface of the problem and often fail to prevent a look that feels more cluttered than curated.
The frustration isn’t just about physical tangling; it’s about the risk of visual chaos. But what if the secret wasn’t in a set of rigid rules, but in understanding a holistic system? The key to mastering the art of accumulation isn’t just about how you layer three necklaces. It’s about how you orchestrate a balance of visual weight and negative space across your entire person—from your earlobes to your fingertips. It’s about creating intentional points of focus, not accidental distractions.
This guide moves beyond the basics to give you a practical stylist’s framework. We’ll deconstruct the principles of proportion and balance, showing you how to build a look that is rich and complex, yet feels effortlessly elegant. You’ll learn not just how to keep your chains from tangling, but how to make every piece work in harmony to tell a cohesive style story.
This article provides a comprehensive system for styling multiple pieces of jewelry. Explore the table of contents below to navigate the specific principles of creating a balanced and sophisticated look.
Summary: Necklace Stacking: A Complete Guide to Layering Jewelry Without the Clutter
- The Midi Ring: Which Finger Should You Leave Bare for Balance?
- Studs and Hoops: How to Arrange Multiple Piercings Geometrically?
- Nickel Allergy: Why Layering Cheap Jewelry Causes Faster Rashes?
- 16, 18, 20 Inches: The Mathematical Formula for Perfect Spacing
- The Removal Rule: How Many Pieces to Take Off for a Professional Meeting?
- Chunky Necklaces or Chandelier Earrings: Which One Suits a Turtleneck?
- Cuff Over Sleeve: How to Keep It in Place on a Silk Shirt?
- How to Style Oversized Jewelry Without Looking Cluttered at Work?
The Midi Ring: Which Finger Should You Leave Bare for Balance?
The art of stacking rings extends beyond simply piling them on. Just as negative space is crucial in design, a bare finger is a powerful tool for creating balance and preventing a cluttered look. A hand full of rings without a visual pause can appear heavy and overwhelming. The choice of which finger to leave bare is a strategic decision that influences the overall harmony of your hand’s « story. » It transforms an accidental omission into a deliberate, stylish statement.
Think of your hands as two small canvases. Leaving the same finger bare on each hand creates a sense of symmetry and order. For instance, keeping both middle fingers unadorned provides a central axis that balances the pieces on your other fingers. Alternatively, you can embrace curated asymmetry by leaving the index finger of your dominant hand bare for functional comfort, while leaving the ring finger of your other hand bare to draw more attention to a statement midi ring on its neighbor. This approach is less about rules and more about creating a dynamic, personal composition that feels both intentional and effortless.
Consider the function of each finger. The index finger and thumb are the most active in gestures and daily tasks. Leaving one of them bare, particularly the index finger, can make your hand movements less distracting during a conversation and more comfortable throughout the day. Ultimately, the goal is to create a look that feels balanced to you, using a bare finger as a « rest stop » that allows the other, more decorated fingers to truly shine.
Your Action Plan: 4 Strategic Approaches to Balancing Midi Rings
- Identify your dominant hand: Reserve it for fewer, more functional rings to maintain comfort and create an elegant asymmetry.
- Apply the ‘Negative Space Principle’: Select one finger per hand to leave completely bare, treating it as a deliberate visual rest stop rather than an oversight.
- Consider the ‘Hand Gesture Factor’: Leave your most active finger (typically the index) bare to avoid creating a distraction during communication or daily tasks.
- Choose your narrative: Opt for symmetry (e.g., bare middle finger for balance) or storytelling (e.g., bare ring finger to emphasize a significant band on another finger).
Studs and Hoops: How to Arrange Multiple Piercings Geometrically?
A « curated ear » is more than just a collection of piercings; it’s a carefully planned composition. The key to moving from a random assortment to a stylish, geometric arrangement lies in applying principles from art and design. Instead of adding piercings without a plan, think of your ear as a canvas where you balance visual weight, shape, and spacing. The goal is to create a cohesive look that flows with the natural anatomy of your ear, whether you have two lobe piercings or a dozen spread across your helix, tragus, and conch.
One of the most effective principles is the Rule of Odds. An odd number of elements (three, five, seven) is often more visually appealing and dynamic than an even number. For instance, a stack of three hoops graduating in size up the lobe creates a more engaging visual than a simple pair. This principle prevents the arrangement from feeling too static or symmetrical. Combine this with a mix of shapes—the clean line of a hoop next to the focal point of a stud—to create texture and interest. This thoughtful mix prevents the ear from looking monotonous.
As this curated ear shows, the arrangement feels intentional. A common strategy is to place heavier or larger pieces (like a thick hoop) in the lobe, which can visually support more weight, and taper to smaller, more delicate studs or « huggie » hoops as you move up the cartilage. This creates a natural and pleasing visual flow. Planning your piercing configuration with an eye for asymmetrical balance and long-term goals is crucial for achieving an aesthetic that is both personal and artistically sound, ensuring the final result is a cohesive design rather than a chaotic collection.
Nickel Allergy: Why Layering Cheap Jewelry Causes Faster Rashes?
That itchy, red rash that appears after wearing a new necklace is a frustratingly common experience. This is often a sign of contact dermatitis caused by a nickel allergy, a sensitivity that affects a significant portion of the population. Indeed, an analysis by the American Academy of Dermatology suggests that more than 18% of people in North America have a nickel sensitivity. While a single piece of low-quality jewelry might cause a slow reaction, layering multiple cheap pieces can dramatically accelerate the onset and severity of the rash.
The reason for this accelerated reaction is a combination of mechanical and chemical factors. Most inexpensive jewelry is made from a base metal containing nickel, which is then covered with a thin plating of gold or silver. This plating is the only barrier protecting your skin. When you layer multiple chains or bracelets, they constantly rub against each other. This friction acts like fine-grit sandpaper, wearing away the protective plating much faster than a single piece would.
Once the plating is compromised, the exposed nickel is free to interact with your skin. This process is further intensified by sweat, which acts as an electrolyte, creating a chemical reaction that leaches nickel ions from the metal and transfers them directly onto your skin. As one expert explains, this combination is the perfect storm for an allergic reaction.
Layering increases friction between chains, which scrapes off protective plating. This, combined with trapped sweat (an electrolyte), accelerates the chemical reaction that leaches nickel ions onto the skin.
– Dr. Rajani Katta, Nickel Allergy and Jewelry Guide
To avoid this, the most effective strategy is to invest in high-quality, nickel-free materials like sterling silver, solid gold, platinum, or titanium, especially for pieces that will be in direct, prolonged contact with your skin. If you do layer plated jewelry, be sure to take it off at night, clean it regularly, and inspect it for any signs of wear on the plating.
16, 18, 20 Inches: The Mathematical Formula for Perfect Spacing
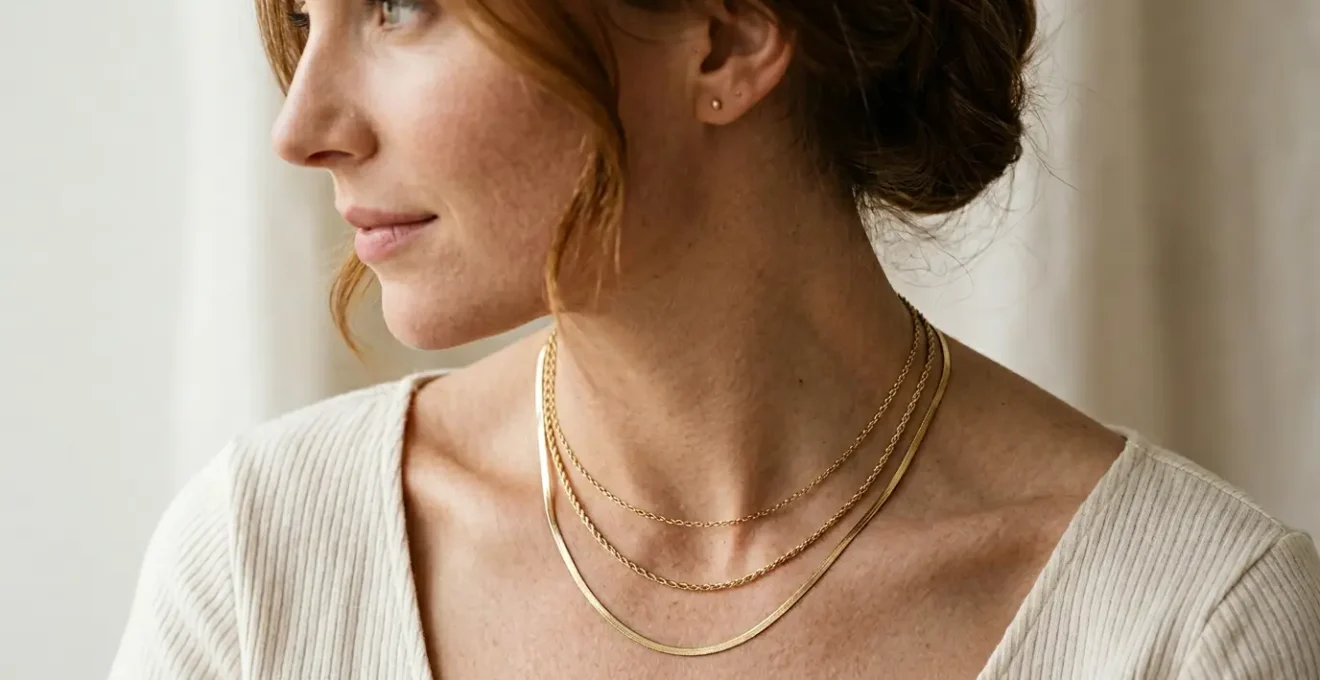
The most common piece of advice for layering necklaces is to vary the lengths, but the « why » behind this rule is often missed. The goal isn’t just difference for its own sake; it’s to create distinct, intentional layers of negative space. The universally accepted formula for achieving this without tangling is to maintain a gap of approximately two inches between each necklace. For example, a classic and foolproof combination is a 16-inch, an 18-inch, and a 20-inch chain. This spacing gives each piece its own territory, preventing them from overlapping and twisting into a single, tangled mess.
However, length is only half of the equation. The other critical variable is visual weight. A delicate 16-inch chain might get lost if paired with an extremely heavy 18-inch chain. The key is to balance both length and weight. If you’re using chains of similar, delicate weight, the two-inch rule works perfectly. If you introduce a heavier piece, like a thick snake chain or a pendant, consider giving it more breathing room. You might pair a 16-inch fine chain with a 20-inch medium-weight pendant necklace, skipping the 18-inch length altogether to give the statement piece more focus.
Understanding the standard necklace lengths and where they fall on the body is the first step to becoming your own stylist. This allows you to visualize your stack before you even put it on, as this guide to necklace lengths illustrates.
| Length | Name | Placement on Body | Best For |
|---|---|---|---|
| 14-16 inches | Choker | Base of neck | Petite frames, layering foundation |
| 18 inches | Princess | Collarbone (clavicle) | Most popular, versatile everyday wear |
| 20-22 inches | Matinee | Upper bust, below collarbone | Adding depth, V-necks, longer pendants |
| 24-30 inches | Opera | Below bust | Dramatic layering, statement looks |
Ultimately, the « formula » is a starting point. Use the two-inch rule as your base, then adjust based on the visual weight of your chains and the neckline of your top. The perfect stack is a balanced composition of length, weight, and the negative space that separates them.
The Removal Rule: How Many Pieces to Take Off for a Professional Meeting?
The famous quote attributed to Coco Chanel, « Before you leave the house, look in the mirror and take one thing off, » is the philosophical foundation of professional styling. In a corporate or formal setting, the goal of jewelry is to complement, not command attention. When transitioning from a casual to a professional environment, the question isn’t just *if* you should remove pieces, but *which* ones and *why*. It’s an exercise in editing, guided by the principle of reducing visual distraction.
A practical method for this is the De-Escalation Technique. Simply identify and remove the single piece with the most visual weight. This could be the longest necklace in your stack, the thickest chain, the largest hoops, or the cuff with the boldest design. This one simple action can instantly shift your look from « statement » to « sophisticated. » For a professional meeting, especially a virtual one where you are seen from the chest up, a simple, delicate necklace and small studs are often the most effective choice. They add a touch of polish without pulling focus from your face or your message.
This minimalist approach ensures your accessories are « silent » partners in your professional presentation. To make this editing process more systematic, you can apply a simple checklist before any important meeting. It helps you shift from a fashion-forward mindset to one focused on professional impact.
Checklist: The Three-Point Focus Rule for Professional Jewelry
- Identify your ‘focal zones’: These are Zone 1 (Ears/Face), Zone 2 (Neck/Décolletage), and Zone 3 (Arms/Hands). A necklace stack counts as one point. Aim for one, maximum two, active zones.
- Assess the impact: Is your jewelry silent? Avoid jangling bracelets or noisy charms in quiet meetings. Is it highly reflective? Light-catching pieces can be distracting on video calls.
- Edit for your role: If you are presenting, a minimal, silent stack keeps the focus on you. If you are networking, a single, unique piece can serve as a strategic icebreaker.
- Apply the De-Escalation Technique: If in doubt, remove the one piece with the most visual weight (longest pendant, thickest chain, or boldest color) to instantly elevate your professional polish.
Chunky Necklaces or Chandelier Earrings: Which One Suits a Turtleneck?
The turtleneck presents a unique styling canvas. With the entire décolletage covered, the neck becomes a backdrop, leading many to assume it’s the perfect stage for a chunky necklace. However, the correct choice between a statement necklace and statement earrings depends less on the neckline itself and more on a crucial, often-overlooked factor: fabric integrity. The material and weave of your turtleneck should be the primary guide for your accessory choice.
A chunky necklace, with its significant physical weight, needs a substantial fabric to support it. A thick, heavy-gauge knit sweater, like a cable-knit or ribbed wool, has the structure and texture to handle a bold chain or a large pendant. The fabric won’t sag under the weight, and the scale of the necklace is proportional to the scale of the knit. In this context, the chunky necklace creates a harmonious and powerful look.
Conversely, pairing a heavy necklace with a delicate turtleneck is a recipe for disaster.
Case Study: The Fabric Integrity Test
An analysis of jewelry pairings shows that a fine-gauge cashmere, merino wool, or silk-blend turtleneck is easily overwhelmed by the weight of a chunky necklace. The delicate fabric can snag, pull, or stretch under the strain, potentially causing permanent damage. For these finer materials, as explored in a case study on fabric integrity, chandelier or other statement earrings are the superior choice. They draw the eye upward, frame the face, and provide a bold statement without interacting with or compromising the delicate fabric of the sweater. This pairing respects the material while still delivering a high-impact look.
The rule is simple: match the weight of your jewelry to the weight of your fabric. For robust, thick knits, a chunky necklace works beautifully. For fine, delicate knits, shift the focus upward to the ears with a pair of stunning chandelier earrings to achieve a look that is both stylish and smart.
Cuff Over Sleeve: How to Keep It in Place on a Silk Shirt?
Wearing a bold cuff or bangle over the sleeve of a blouse is a chic, high-fashion statement. It works beautifully with structured fabrics like cotton poplin or thick knits that provide natural friction. However, when attempted with a fluid, slippery fabric like silk or satin, the cuff often slides down the arm within minutes, turning a polished look into a constant, frustrating adjustment. The lack of texture and grip on the fabric makes it nearly impossible for the cuff to stay put on its own.
Fortunately, there are several discreet stylist tricks to secure a cuff over a silky sleeve, allowing you to achieve this elegant look without the hassle. These methods focus on creating a hidden anchor or increasing friction without damaging the delicate fabric. The key is to create an invisible barrier that stops the cuff’s downward slide, keeping it perfectly positioned at the wrist.
Here are three reliable methods used by stylists to conquer the slippery sleeve problem:
- The Hidden Anchor: This is the simplest and most effective method. Use a small, clear elastic hair tie. Before putting on the cuff, slide the elastic onto your arm where you want the cuff to sit. Then, place the cuff over the sleeve, directly on top of the hidden elastic. The rubbery texture of the elastic provides the necessary friction against the metal to hold it securely in place.
- The Double Bangle Technique: This method uses another piece of jewelry as a physical stop. First, wear a smaller, tighter-fitting simple bangle directly on your wrist, under the sleeve. Then, place your larger statement cuff over the sleeve. The inner bangle acts as a stopper, preventing the outer cuff from sliding past your wrist bone.
- Choose the Right Cuff: Not all cuffs are created equal. When planning to wear one over a sleeve, opt for an adjustable or hinged cuff. These designs can be gently squeezed to tighten their grip over the fabric, providing more security than a solid, slip-on bangle that has a fixed diameter and is more prone to sliding.
By using one of these techniques, you can confidently wear a cuff over any sleeve, transforming a potential style frustration into a secure and sophisticated statement.
Key takeaways
- Master the « One Focal Zone » Rule: To avoid a cluttered look, let only one area—neck, ears, or hands—feature oversized or multiple pieces at a time.
- Embrace Negative Space: A bare finger or the two-inch gap between necklaces is a deliberate choice that makes your other pieces stand out more effectively.
- Prioritize Fabric Integrity: Match the visual and physical weight of your jewelry to the fabric of your clothing to prevent damage and create a harmonious look.
How to Style Oversized Jewelry Without Looking Cluttered at Work?
With workplace dress codes becoming increasingly relaxed, the opportunity to express personal style through accessories has grown. A recent business guide notes that nearly 80% of American workplaces now have a casual dress code, opening the door for bolder pieces like oversized jewelry. However, there is a fine line between making a confident statement and creating a look that feels cluttered or distracting in a professional context. The secret to wearing oversized pieces successfully lies in one foundational principle: restraint through focus.
The most effective strategy is to adopt the « One Focal Zone » rule. Think of your body as having three primary zones for accessories: Zone 1 (the face and ears), Zone 2 (the neck and décolletage), and Zone 3 (the hands and arms). To maintain a polished and uncluttered look, choose only one of these zones to feature an oversized or « statement » piece per outfit. If you wear a large, chunky necklace, keep your earrings minimal (like simple studs) and your wrists bare or with a very delicate bracelet. If you opt for large, dramatic earrings, forgo a necklace entirely. This singular focus ensures your statement piece has the impact it deserves without competing for attention.
As one design house aptly puts it, this principle is the cornerstone of bold yet professional styling.
The cardinal rule is to feature an oversized piece in only one zone per outfit to guarantee a look that is bold yet uncluttered.
– Dana Rebecca Designs, Office Jewelry: Professional and Comfortable Pieces
This disciplined approach allows you to incorporate your personality and bold taste into your work wardrobe in a way that reads as intentional and sophisticated. By isolating the statement, you control the narrative, ensuring your jewelry enhances your presence rather than overwhelming it. It proves that powerful style is often about the pieces you choose *not* to wear.
Now that you have the complete system, you can approach your jewelry box with a new perspective. Start curating your collection and daily looks with intention, evaluating each piece not as an individual item, but as a component of a cohesive, stylish, and uncluttered whole.